We strongly recommend using a virtual machine for the hands-on parts of the workshop.
A virtual machine, or VM, enables you to run a different operating system on your computer, from within your existing operating system. For these workshop we will use a VM image to run a fully configured Linux instance on participants’ laptops. This will allow you to switch between your native/host operating system (Windows, Mac OS, Linux) and the guest Jupyterlab Linux operating system.
Using a virtual machine ensures that you will be running with the same configuration as the instructor. It also relieves you from having to setup your jupyterlab instance and installing prerequisites. With the Resbaz jupyterlab provided VMs you will also receive support from the instructors and your fellow attendees.
Getting ready for the workshop
Make sure the following steps are done before the workshop. These steps take some time, and require downloading large files, so please do not postpone this until you arrive. Contact us (organizers@swcarpentry.uio.no) before the workshop if you have any problems.
-
Install VirtualBox on your laptop
-
Download and install the VirtualBox package from this link.
-
You can install the latest version or at least version VirtualBox 5.2.
-
-
Install the needed VM on your laptop
You will want to download this VM before arriving at the workshop, because it is a large file and it will take too much time to download over the wifi network.
-
Download Resbaz Jupyterlab VM OVA file (12.6GB)
-
This VM contains:
- Anaconda with python 3.7
- TexLive 2018
resbazconda environment with Jupyterlab and other python packages we will be using for the workshop.
Please note that for the workshop, we will be using python 3.6 from
resbazenvironment. Everything has already been set up in the VM. -
This section will include directions on how to start up, access, and use these virtual machines on your laptop.
Import the VM into VirtualBox
First, make a backup copy of the downloaded .ova file(s). If something goes wrong you can always make a new copy.
Import the VM image into VirtualBox by either starting the downloaded .ova file directly, or by launching VirtualBox and navigating to File → Import Appliance and opening the file.
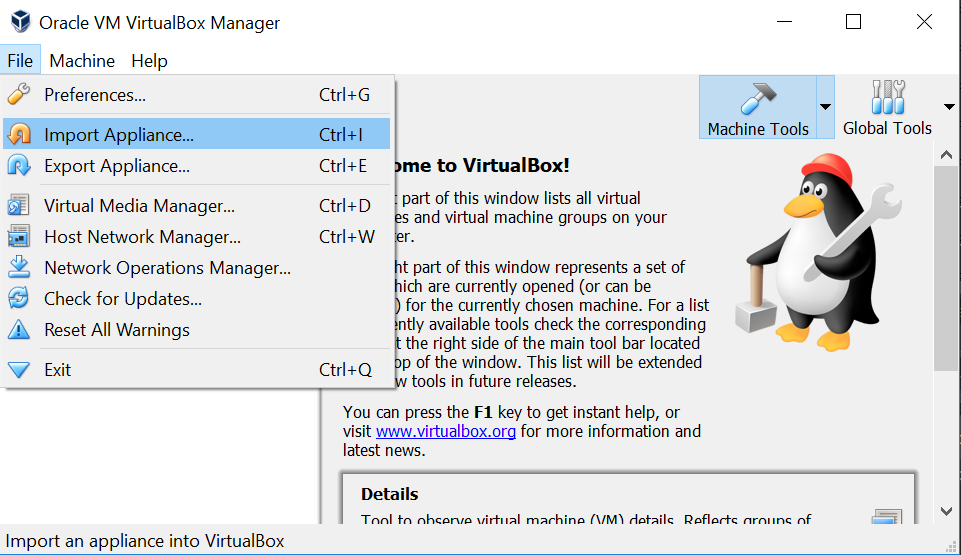
This will display the Appliance Import Settings window. Click the Import button. It may then take several minutes for VirtualBox to import the VM. Once it is done, a new VM will appear in the left pane in the ‘powered off’ state. The VM is now installed.

Start VM
-
Double-click on the new VM in the left panel of VirtualBox. This starts the VM and displays two informational messages about regaining control of your keyboard and mouse from the VM. Click OK for both. A screen showing the defined user on this machine is shown. Click on the resbaz user and then enter the password (123456789).
-
This will log you in and show the ubuntu desktop.
Start jupyterlab
- Open a terminal
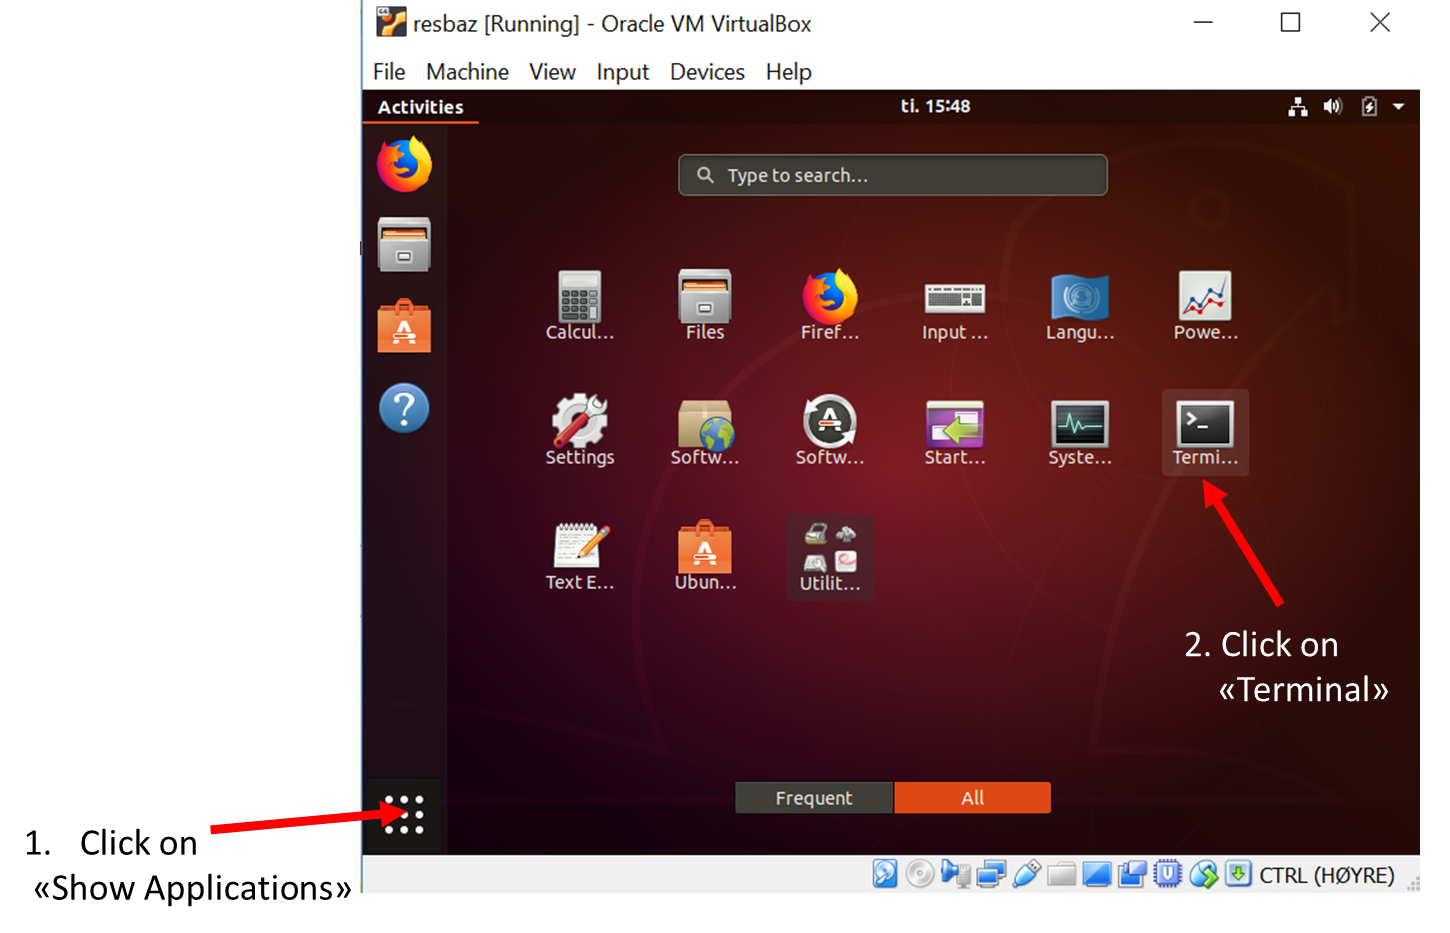
anaconda-navigator
You should get the anaconda-navigator as shown on the figure below:
- Then select
resbazenvironment:
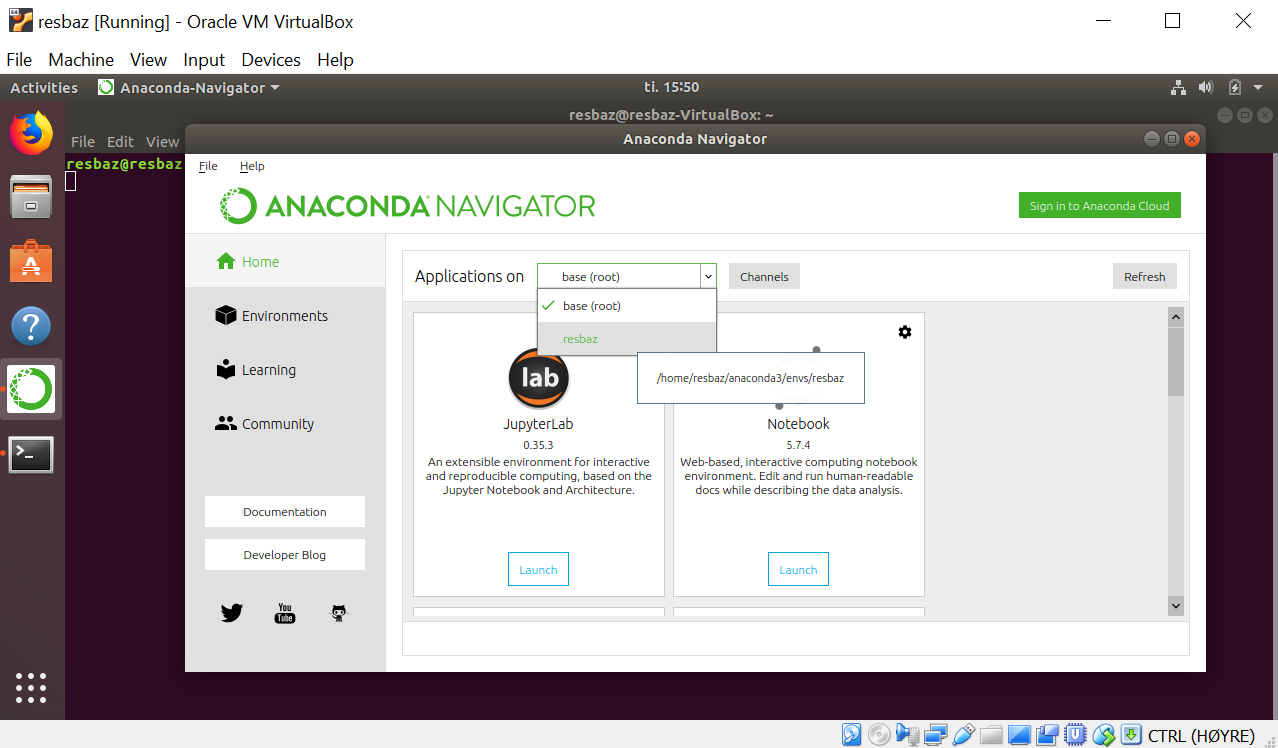
- Then launch
jupyterlab
You are done!
Troubleshooting
VirtualBox does not show 34-bits images
If VirtualBox is only showing 32-bit versions in the Version list make sure:
- You have an x64 CPU installed. (Optimally, a 64-bit OS should also be installed to receive acceptable virtualization performance.)
- Hardware virtualization is enabled in the BIOS. (Your CPU must support it.)
- For Intel x64: VT-x (Intel Virtualization Technology) and VT-d are both enabled
- For AMD x64: AMD SVM (Secure Virtual Machine) is enabled
- Hyper-V (or any other form of bare-metal hypervisor) is not installed
For more information follow this link.
VirtualBox 6.0 Installation problems on Fedora 29/28, CentOS/RHEL 7.5/6.10
- Follow instructions given here
Github Account
Go to the GitHub Homepage
Important notice
This setup instruction are from https://reproducible-science-curriculum.github.io/sharing-RR-Jupyter/ and is distributed under the Creative Commons Attribution license. The following is a human-readable summary of (and not a substitute for) the full legal text of the CC BY 4.0 license.
To use GitHub one needs to register for a (free) account. To register for a GitHub account we need to:
- Open a web browser
- Navigate to github.com
We should see the the web page below.
Note: If you already have a GitHub account you do NOT need to create a new one. Please skip this step.

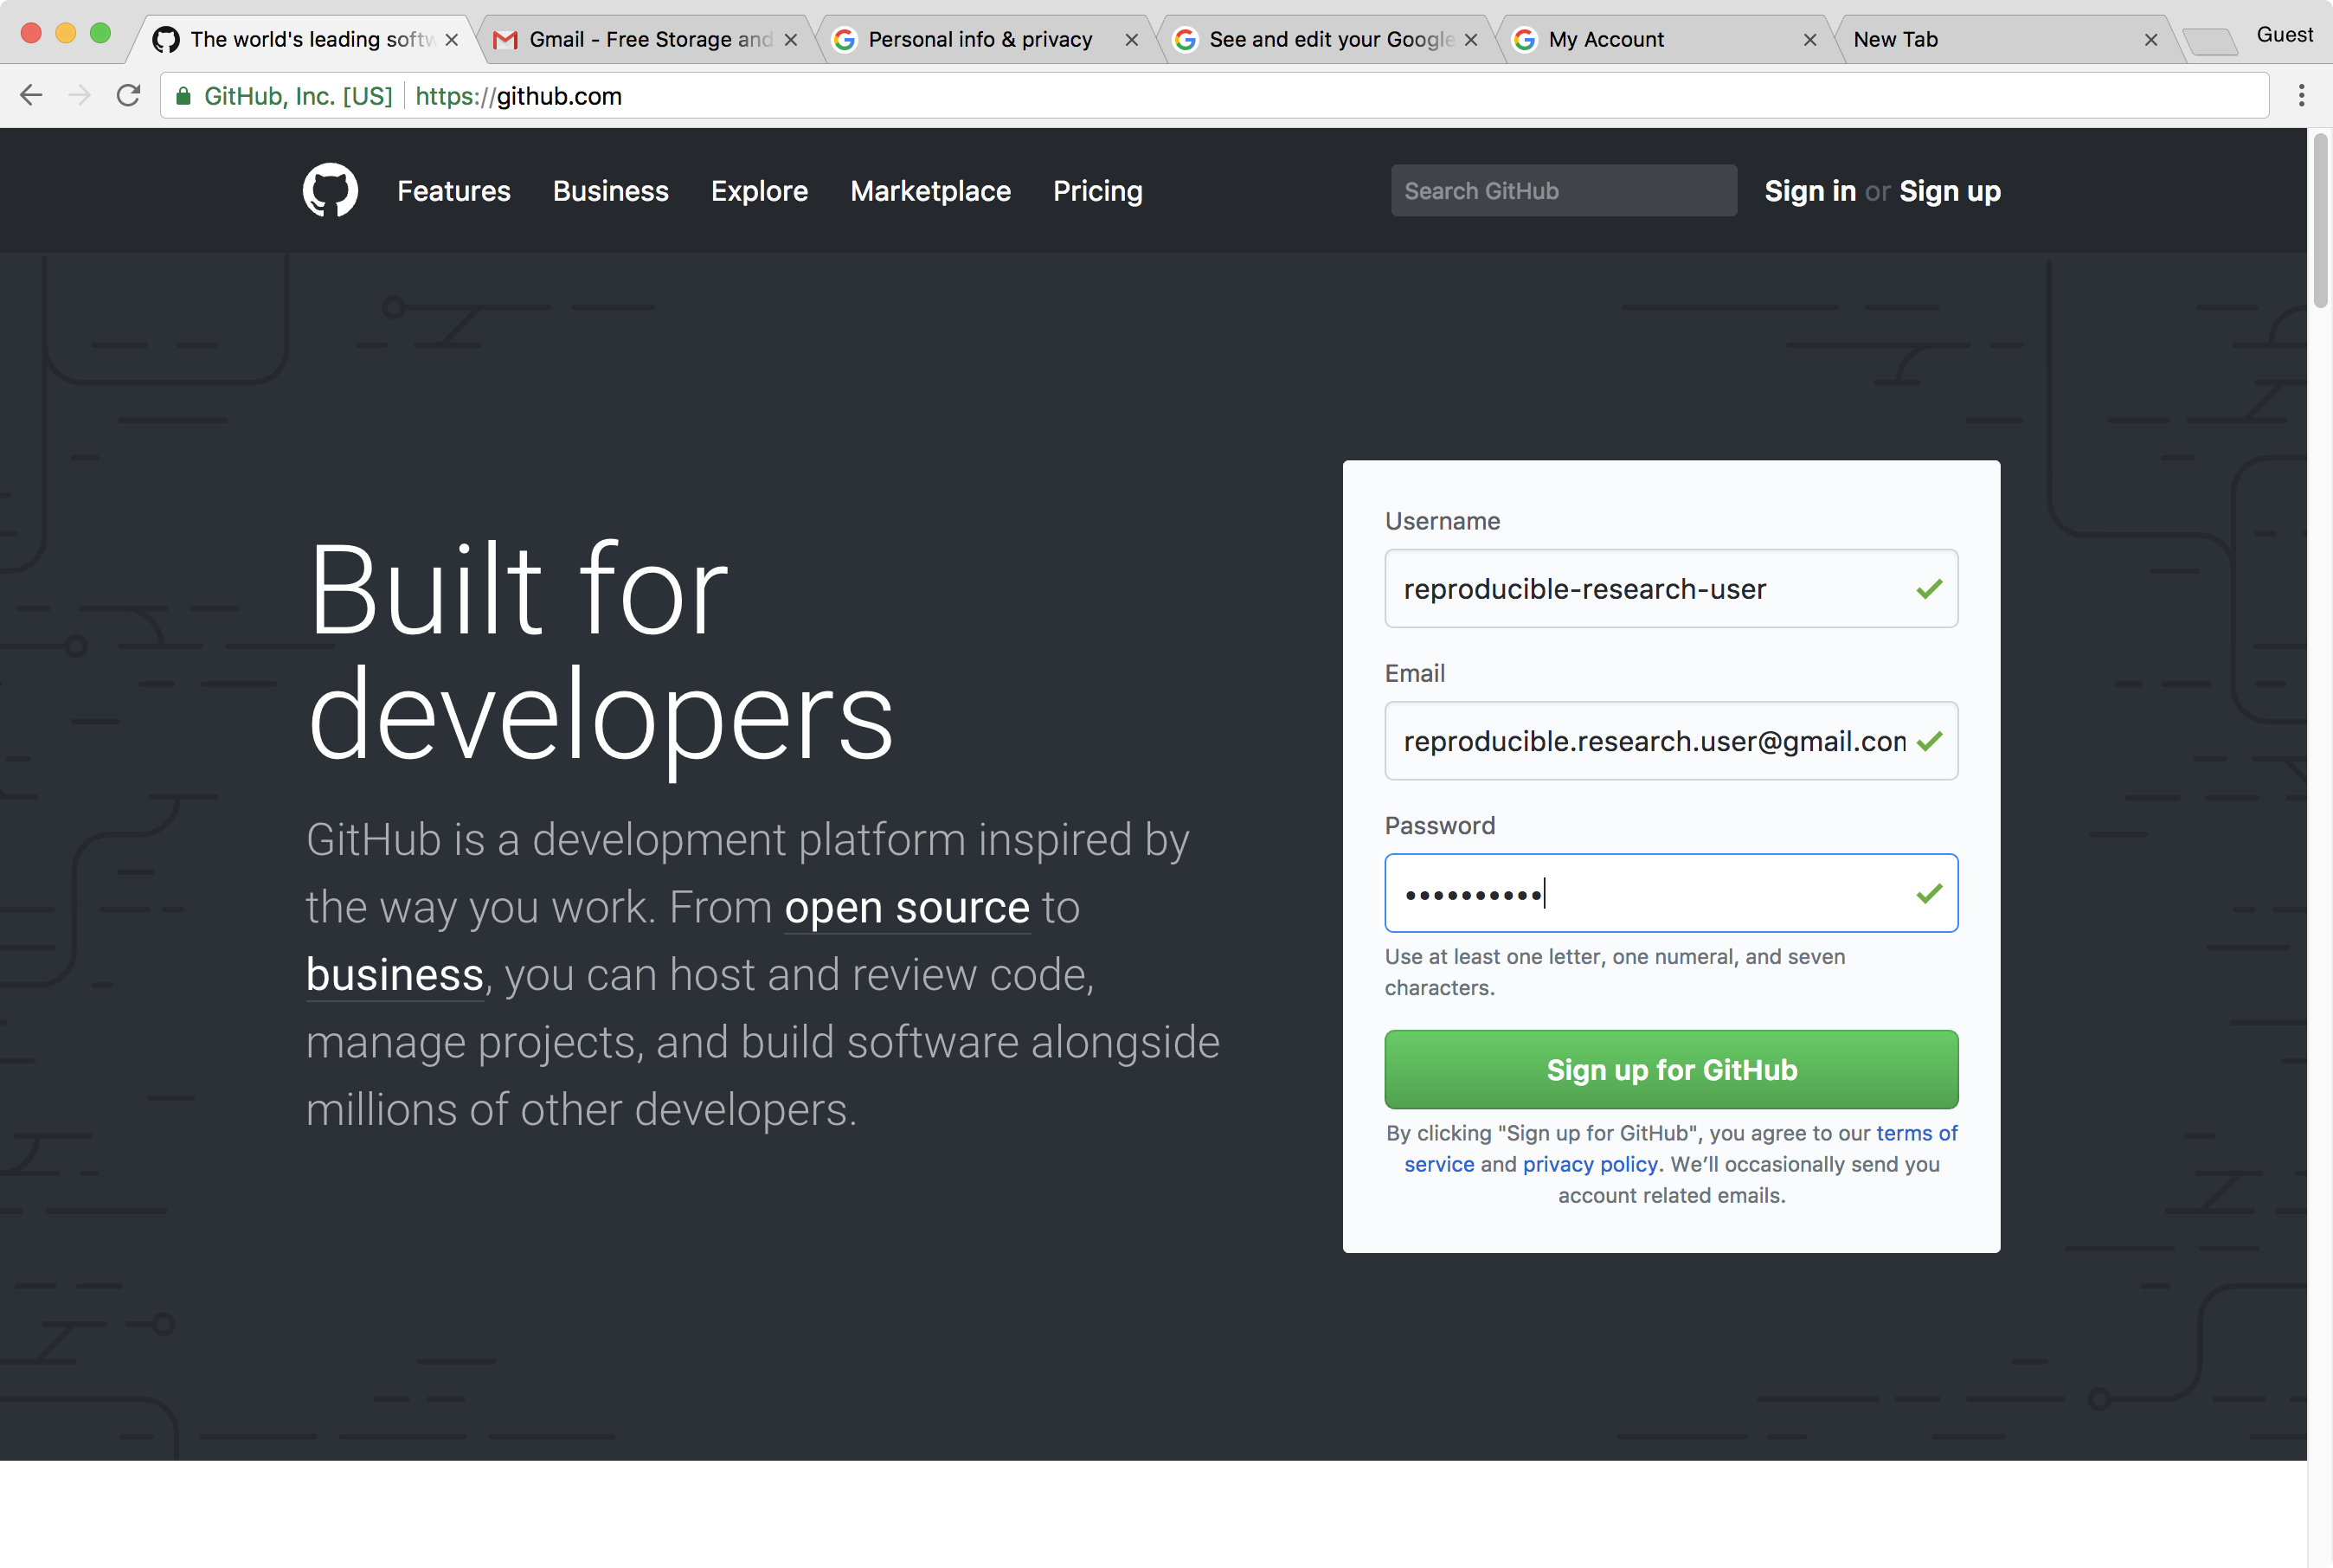
To create a GitHub account
-
On the GitHub homepage enter:
- a username
- an email address
- a password
-
Click the green Sign up for GitHub button.
An example is shown in the screenshot below.
We are asked to confirm the email address that we used to sign. Please confirm the email address.
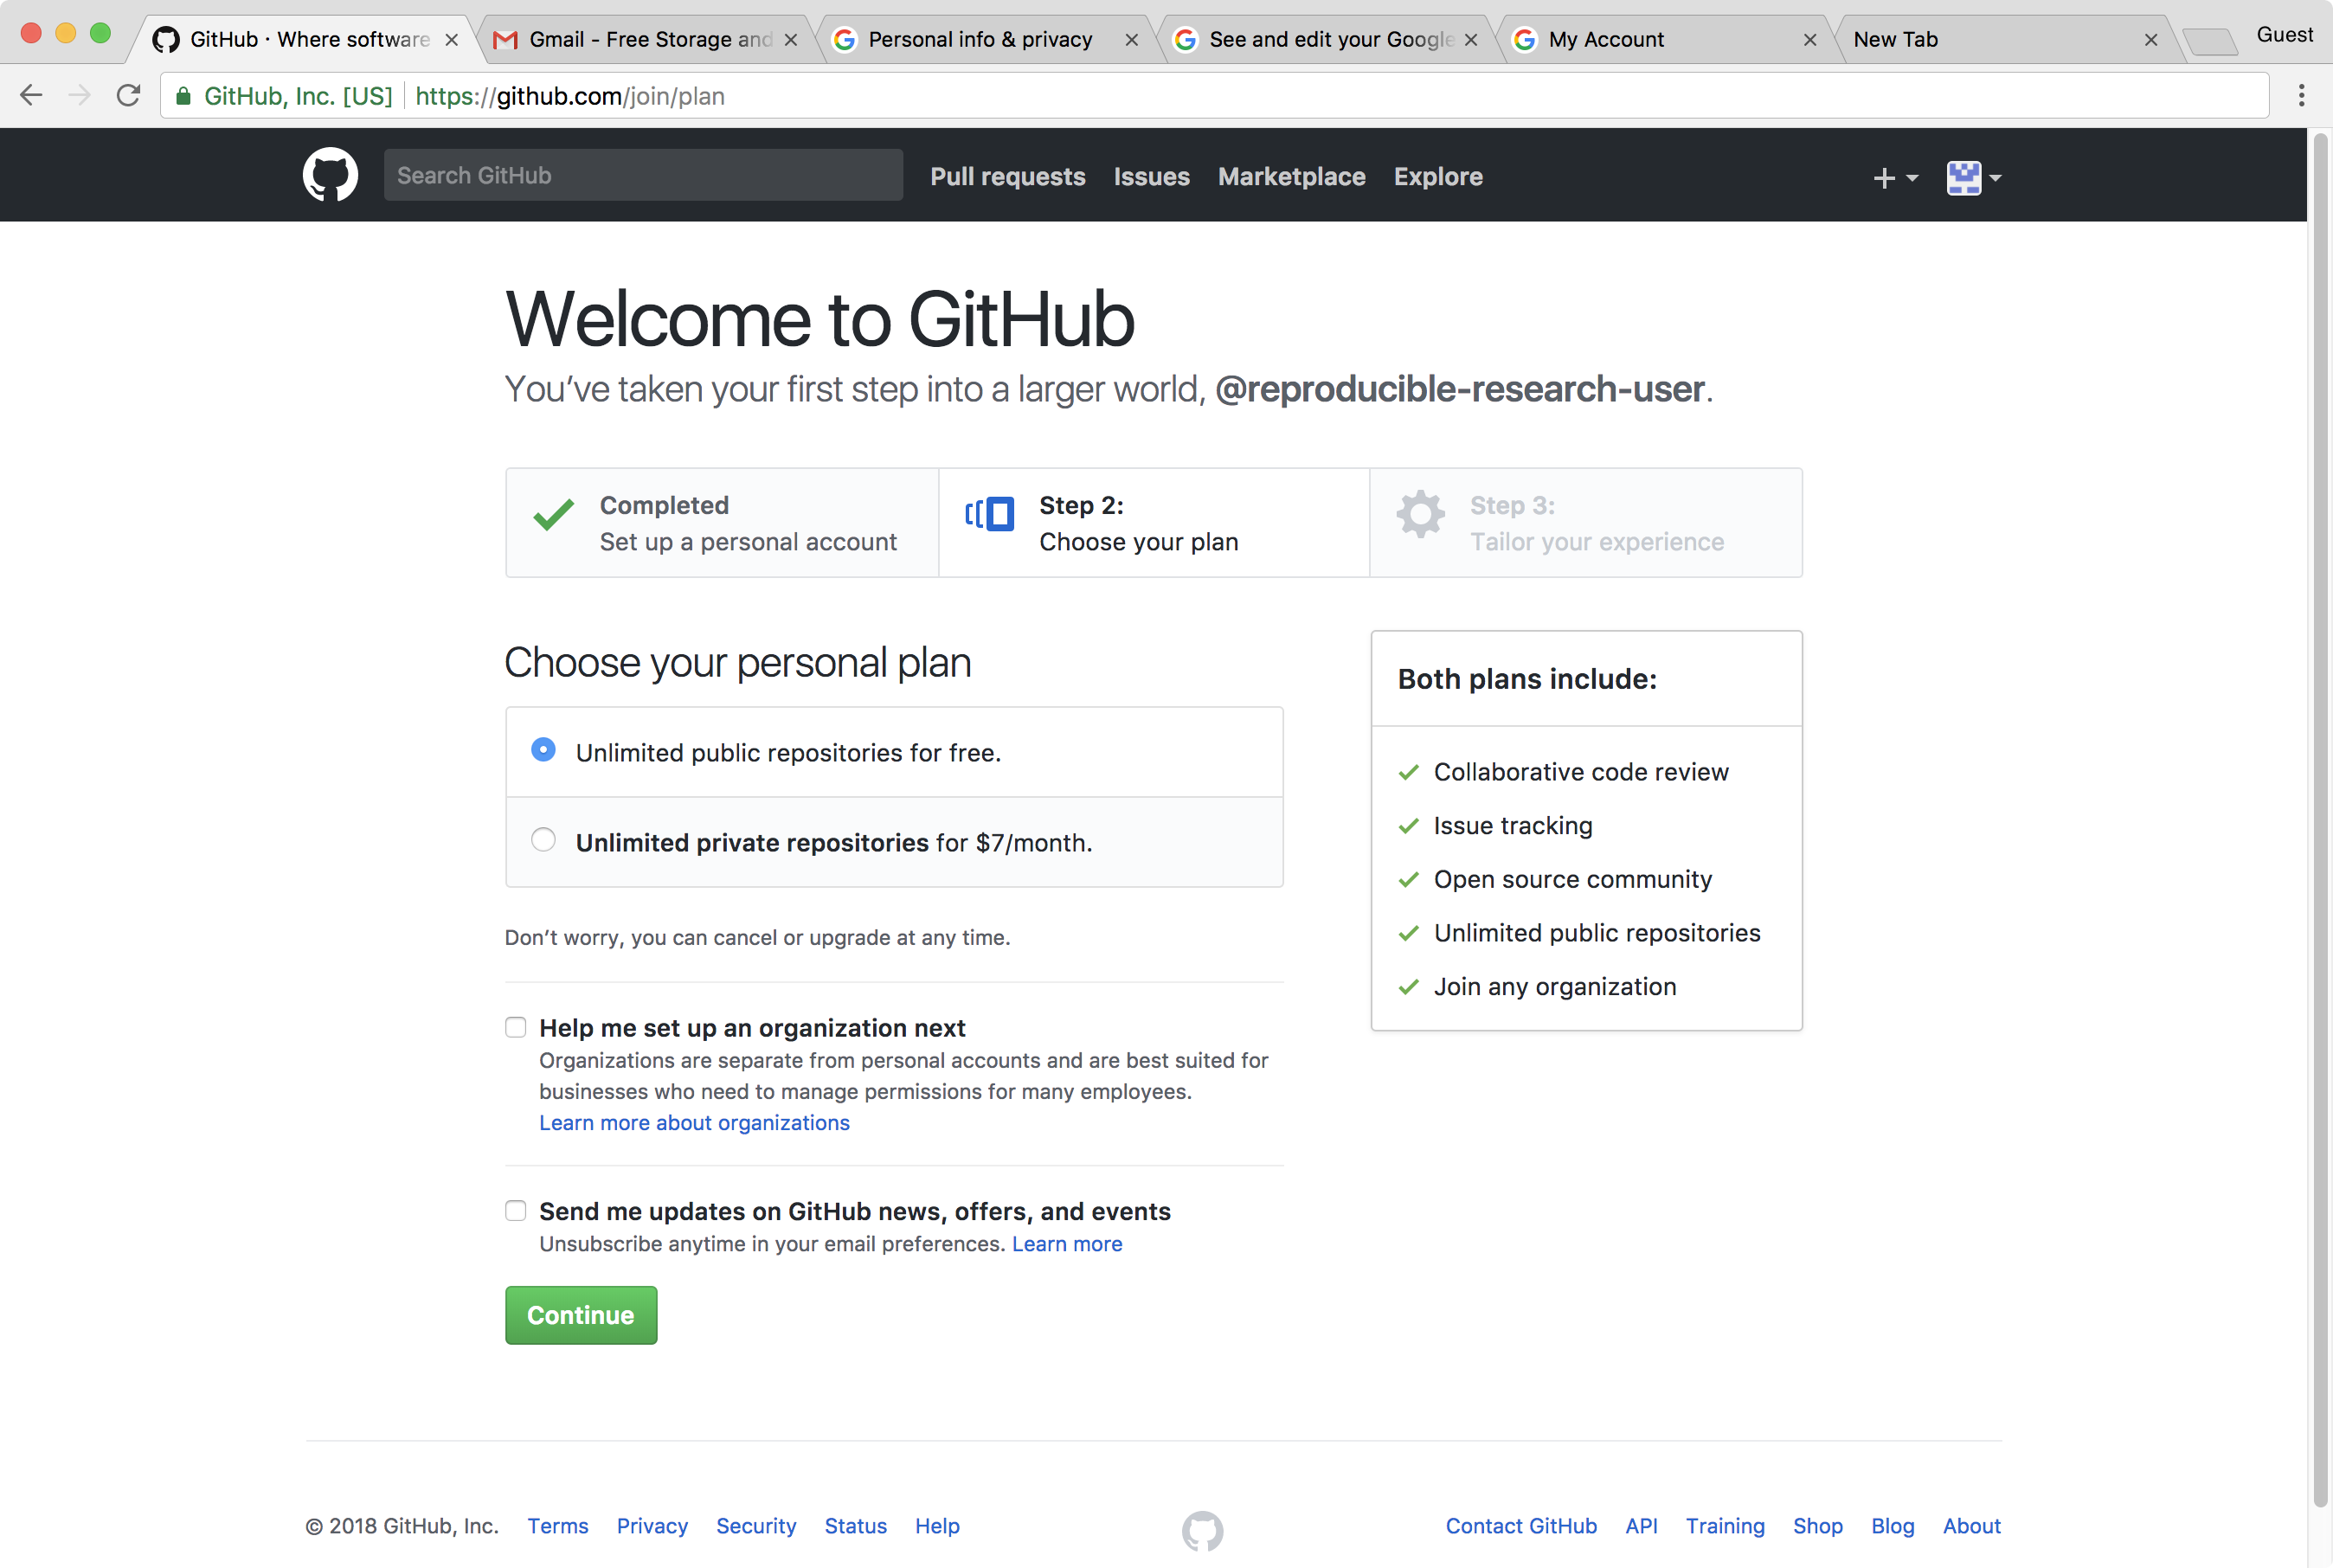
Select a plan
We have to choose a plan that we would like to use. We will use the personal (default) plan.
Click on Continue.
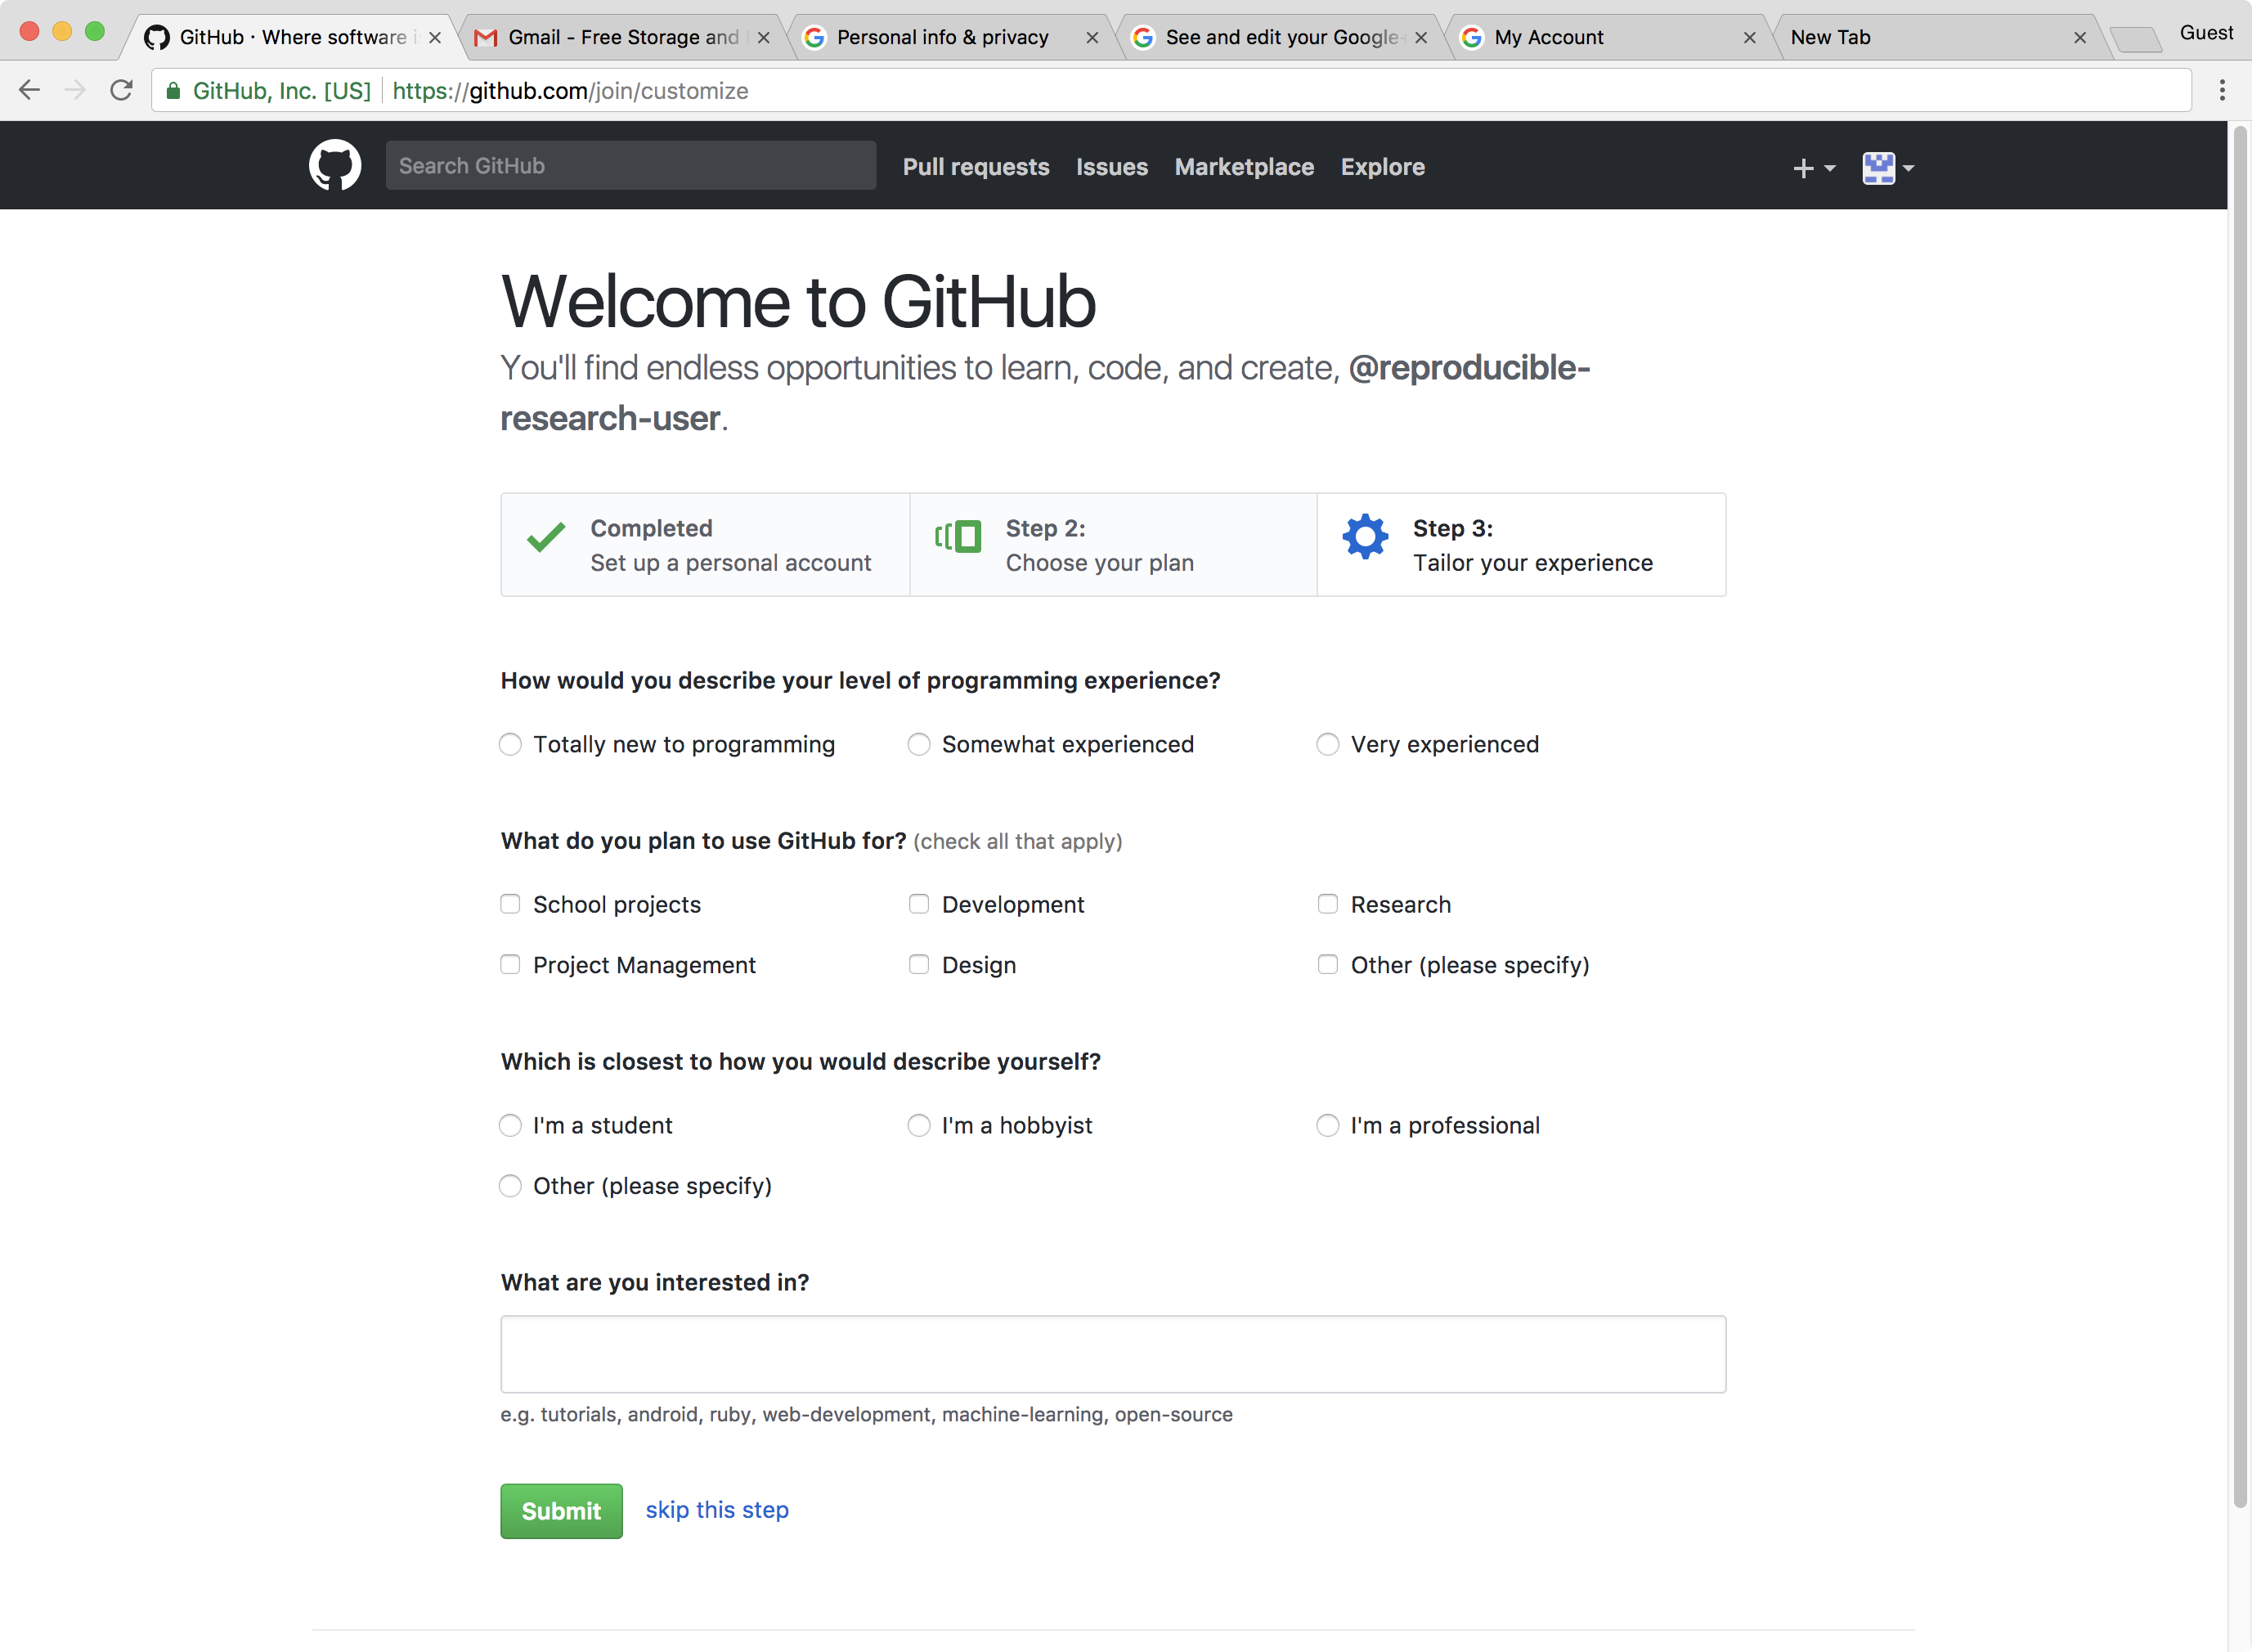
Completing our signup
We can select any options we would like (or none).
Click Submit to complete our Github account setup.