A very simple weather station
Overview
Teaching: 0 min
Exercises: 0 minQuestions
How to add a sensor to measure temperature?
How to add a new sensor in our program?
How to add a sensor to measure light?
Objectives
Become familiar with our new temperature sensor
Add our temperature sensor into our circuit
Update our program to measure temperature
Add a photodiode to our circuit
Update our program
Dallas DS18b20 thermistor
DS18b20 information
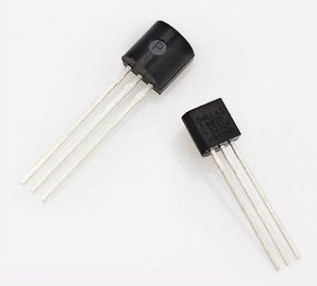
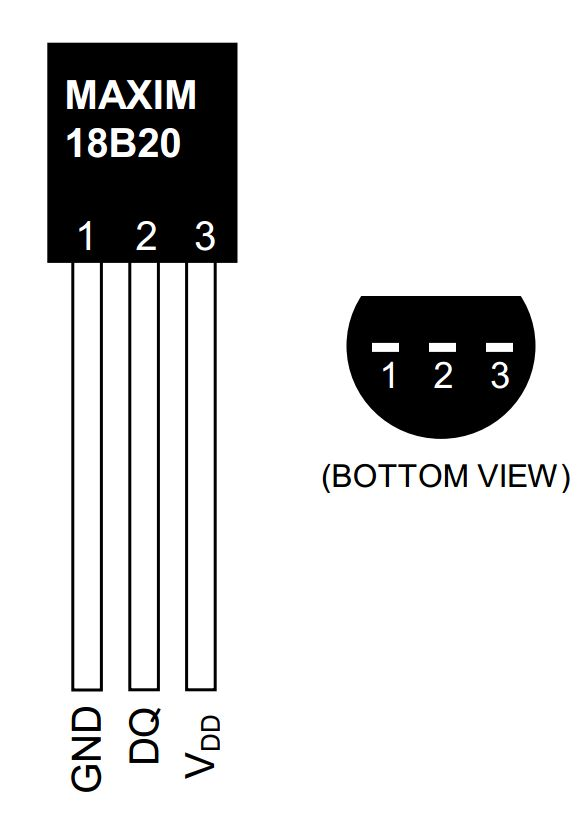
Connect a DS18b20 to our ESP8266
We will add our DS18b20 to the previous circuit. For now our LED will blink independently from our temperature sensor. Later, we will add a photodiode and switch on the LED at “night”.
-
First disconnect your ESP8266 from your computer
-
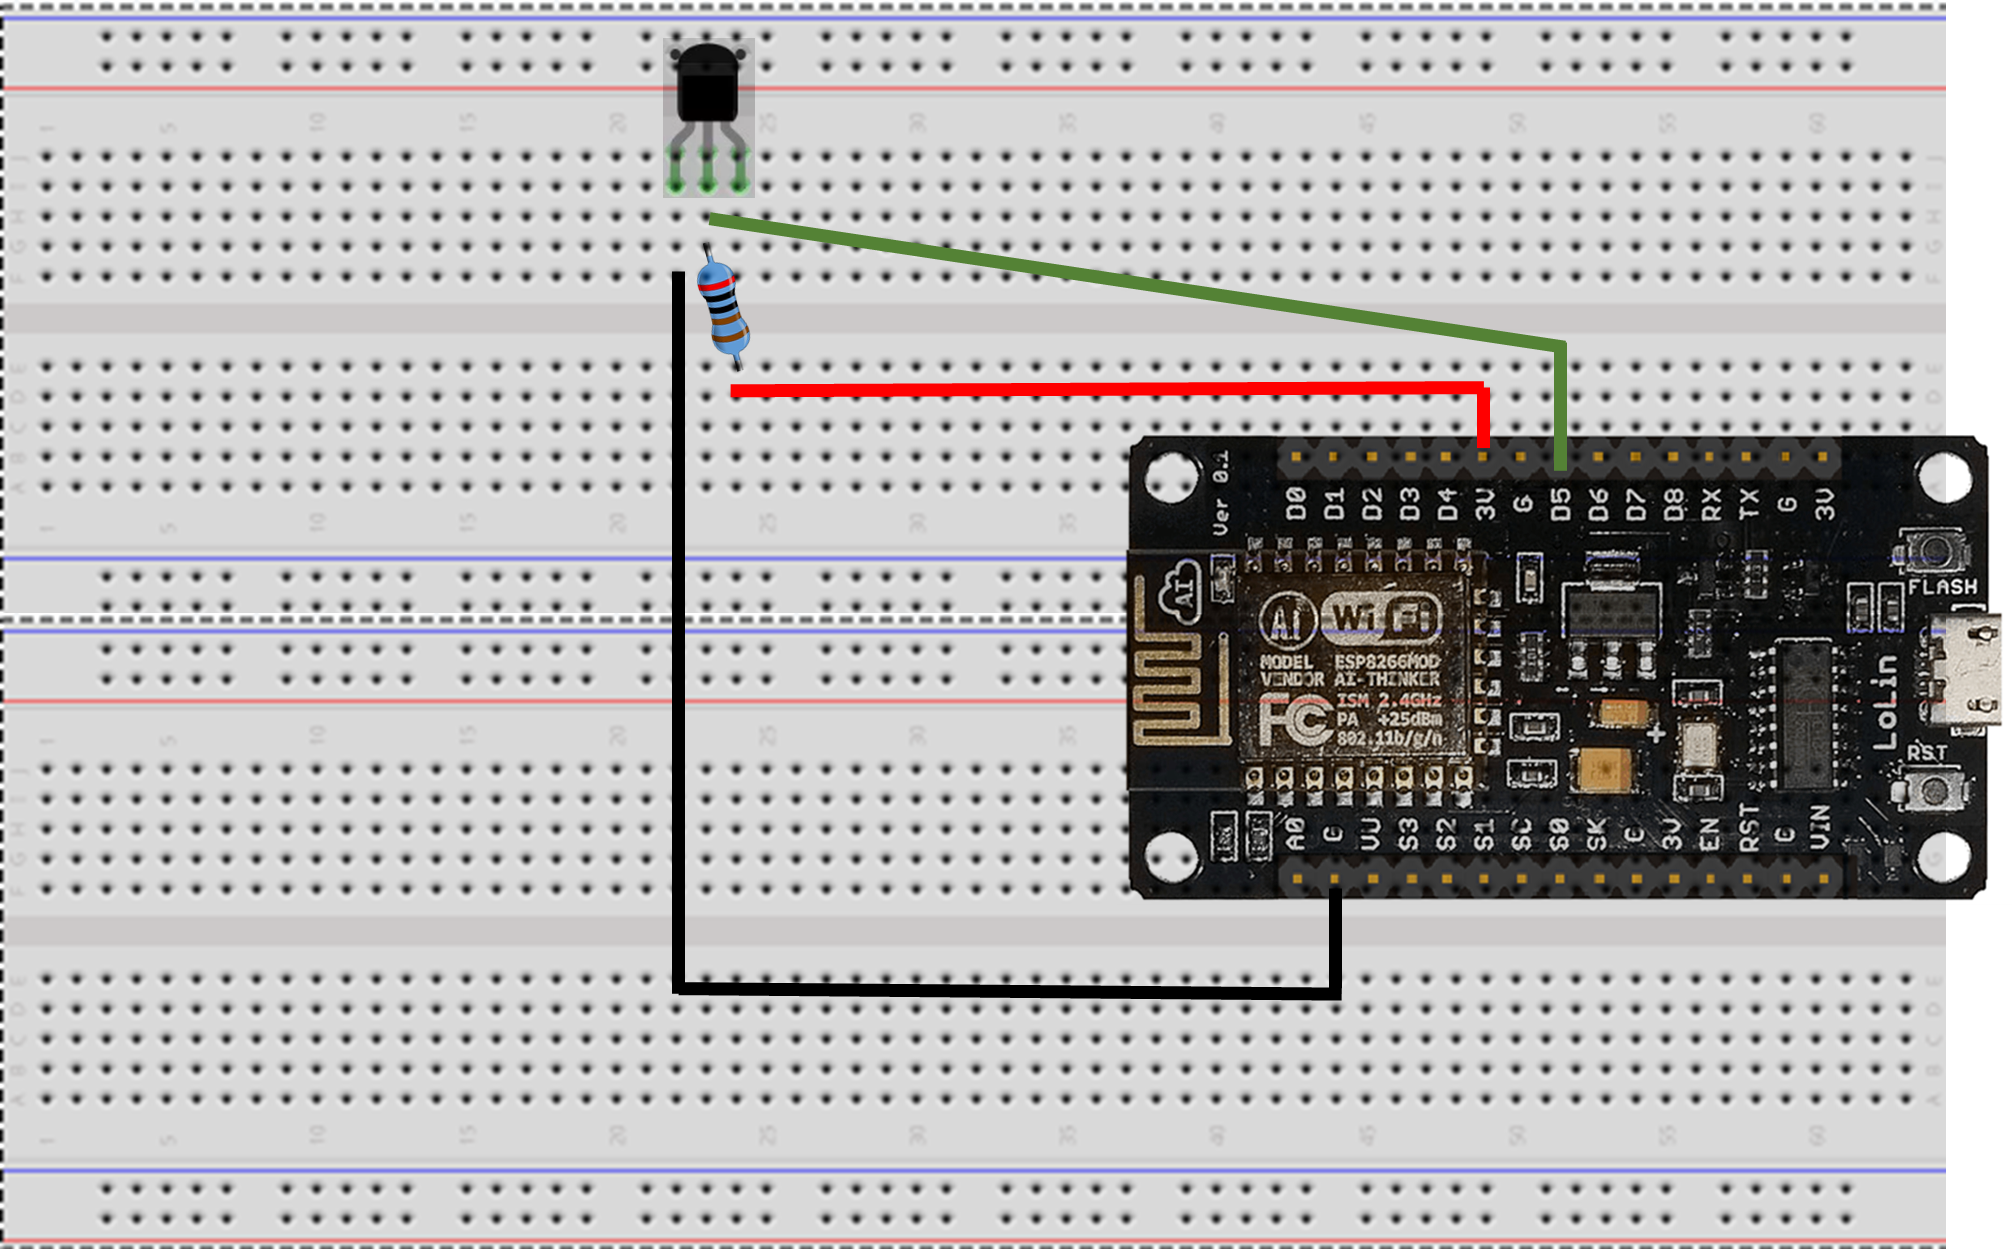
As for the LED, we need to add a resistor in order to pull down the voltage to 0 and allow the sensor to send a new value.
In our example, a 2.2 kohm will be used.
-
Bend (gently) the 2 legs of the resistor (to make a U) and place it on the breadboard with one leg connected to the second leg of the DS18b20 (DQ) and the other leg connected to the last leg of the DS18b20 (VDD).
-
Finally connect the first leg of the DS18b20 to the ground (G), the second to 3V and the last to GPIO 14 (D5) as shown on the figure below:
Get data from your program
In order to acquire data from the DS18b20, you need to install a new library on your computer.
- Download OneWire Library on your computer
- Add it to your Arduino libraries (Sketch –> Include Library –> Add .ZIP library)
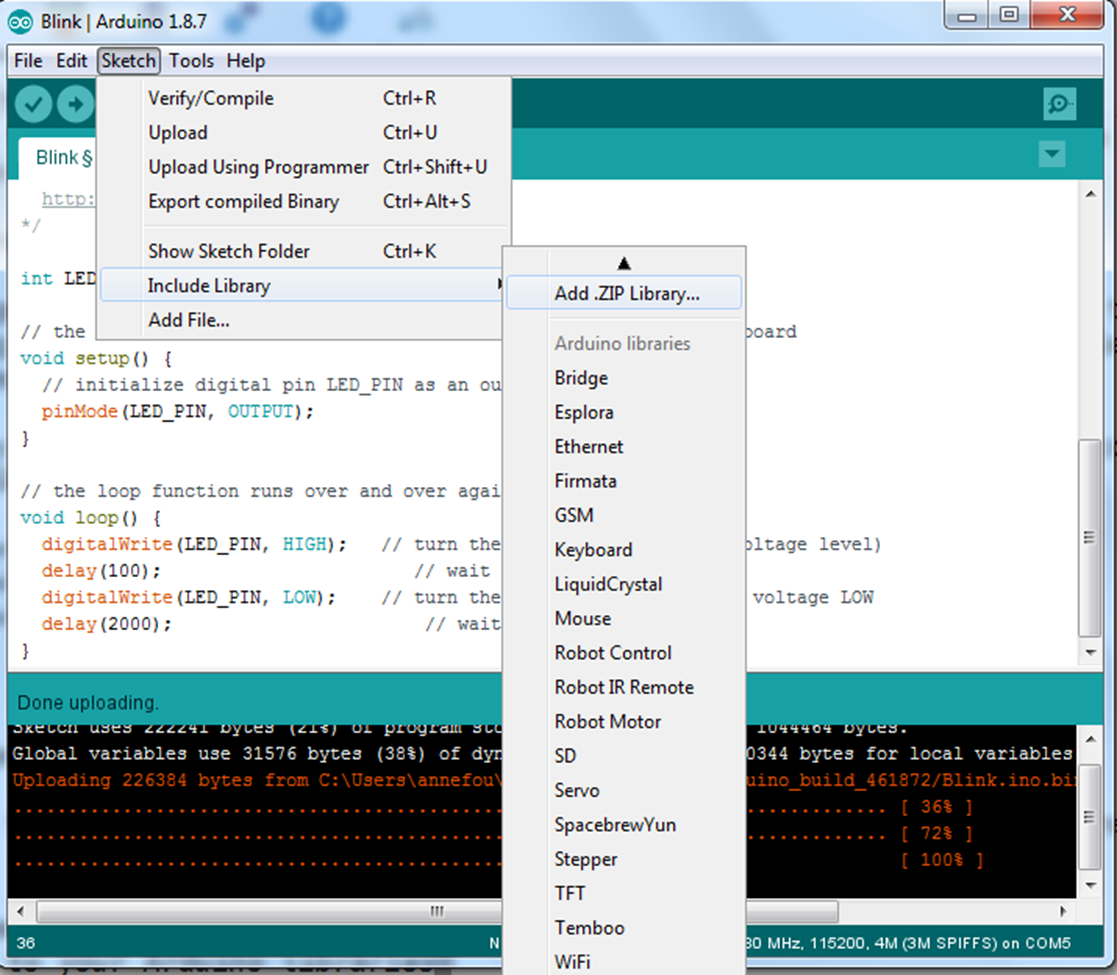
Search in your Downloads folder where your OneWire.zip file was stored and add it.
-
Download the code to acquire and print data from the DS18b20 thermistor
-
Connect your ESP8266 to an USB port on your computer. Check it is recognized properly.
-
Compile, upload and execute the code
Visualize data
- Tools –> Serial Monitor
It will show values as printed on a serial port in the program
- Tools –> Serial Plotter
It will plot the values. Please make sure you first close the Serial Monitor before opening the Serial Plotter (both cannot work together).
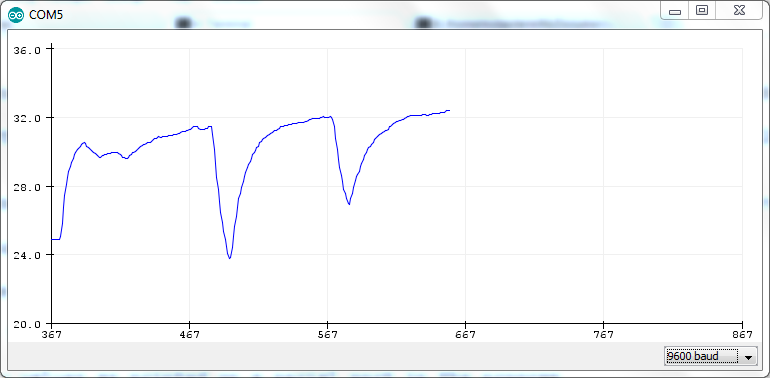
In both cases, make sure you select “9600 baud”.
Photodiode
We will now add a photodiode to the previous circuit and switch on the LED at night only.
Key Points
Use a motherboard with several sensors
Run our program to print and plot measured values